
So, here is my entry to the Design It! Challenge.
Here is my inspiration behind this design: My mom does an incredible amount of work for charity working with a chapter of It's My Very Own (IMVO) that meets weekly on Mondays in Apache Junction, AZ. From 2007-2011 they delivered a total of 500 bags. In the past two years they have delivered 483 bags. Already in 2014 two other agencies have signed on to be recipients, so they anticipate a huge increase in demand for their bags this year. The bags are referred to as a "Bag of Love". Several local organizations have been generous contributors to this effort. All contributions are greatly appreciated. Sometimes when someone in the area is cleaning out their estate, downsizing, etc. fabrics will be donated to the group. Good quilting cottons are hard to come by, but they use as many types of fabrics that are reasonable. They often receive types of fabrics that just can't be used in a quilt and have been quite inventive to create other objects that they can sell or put the fabrics in a bi-annual rummage sale whose proceeds go to a local one room school that they support. Not often does an organization have the opportunity to pass along goods that aren't quite the right fit in such a productive way. I continue to be impressed with their charitable spirit.
What is a "Bag of Love" you ask? Each Bag of Love includes a handmade quilt, stuffed animal, toys, and personal care items that are gender and age appropriate. There are 10 separate groupings of gender/age.
They aim to have the quilts be a 48"x60" size. So, since I had suggested to my mom that while I was in AZ, if the volunteers would appreciate a quilting class, maybe I could help them with a fairly simple, yet different than they usually put together for their charity quilts. Since these bags even go to teenagers, something with a bit of design I thought would be nice.
This design helps to teach color value and the importance of understanding lights to darks and how it can effect the design. With a border fabric of their choice that might be something hard to work with, choose 4 coordinating colors. Place them in order of what your perceived value from light to dark is and take a black and white photocopy of it to test your perception. If you got it right they will shade from light to dark in a natural progression. If not, rearrange the order so that you can get the appropriate contrasts and effect of the intended design.
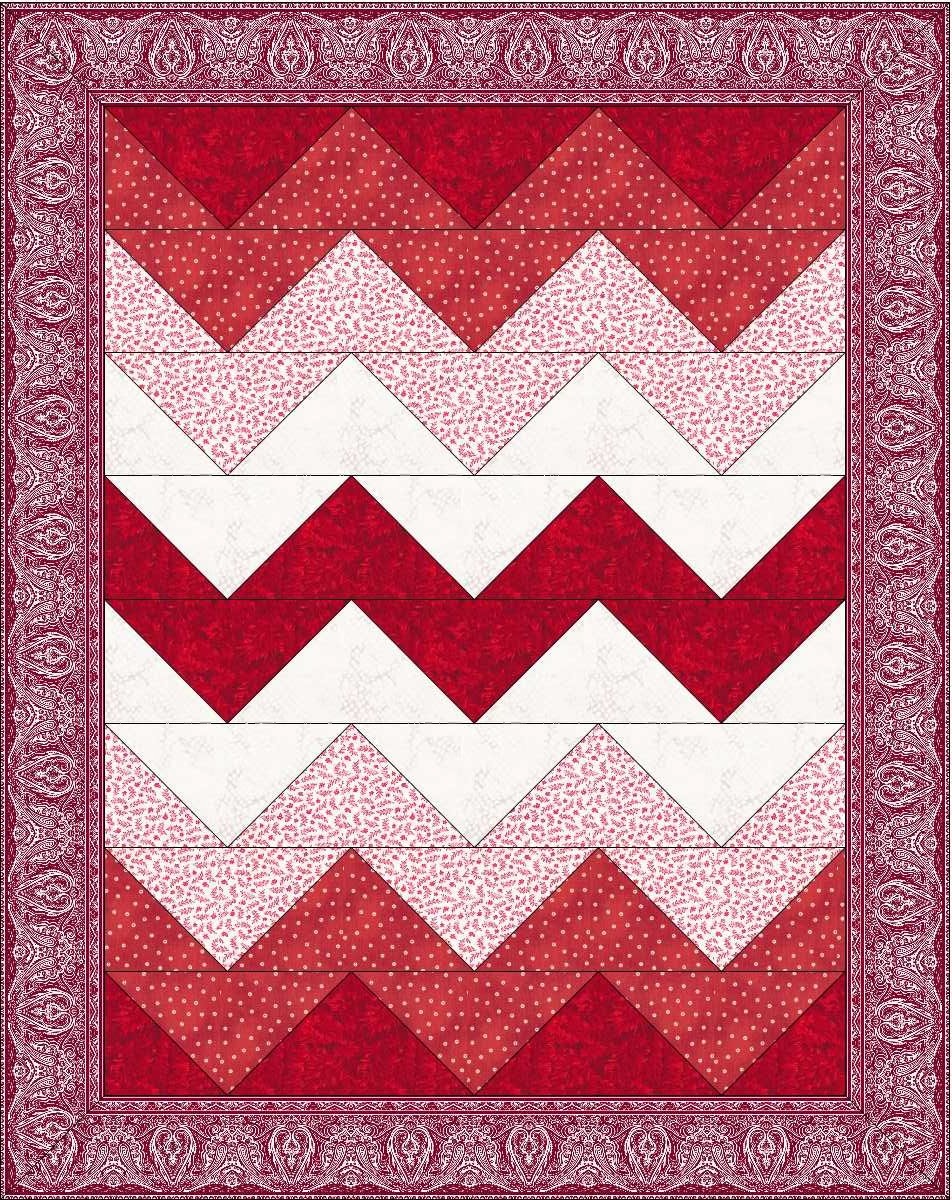
 This is the design result in black and white. (48"x60")
In red and white with a Jinny Beyer border from her Monochrome line.
Fabric Requirements:
Border: 1.5 yards if pieced; if cut lengthwise with a border print --2 yards
Four values - EACH 1 yard
This is a generous portion. If you have usable 41.75" WOF, then 14.25" x WOF is sufficient.
Binding: 0.5 yard
Backing: 2.75 yards
Some of their results:
 |
| by Betty |
 |
| by Cindy |
 |
| by Margaret |
 |
| by Kris |
 |
| by Mary |
 |
| by Mary |
 |
| by Sally |
There are several ways to construct this quilt (half square triangles and two strip sets are just two ways that I can think of quickly), but I choose to minimize the number of seams and keep use of fabric efficient, which required diagonal sewing on the bias when assembling an individual row.
Key piecing elements include knowing when to have a dog ear at each end and when you don't! The triangles at the end of each row matches up at the point, but the other end of it needs a dog ear. The large triangles all need dog ears at each intersection. Once you have the whole row put together. Repeat until all rows are are complete and sew the rows together. I found pressing the seams in a given row in the same direction (need to think about this while you're piecing the row together) keeps a better 'average' of intersection depth rather than getting some quite flat seams and some double overlapped seams. This design is easily adapted into larger sizes.
I have upsized it to twin, queen and king sizes. I have designed pieced borders for the queen and king size. The sizing provides a bit more opportunity to design something to sit ON the bed, and something separate for the sides of the bed.
Fabric Estimates below are based on EQ7 calculations.
 Twin - Approx 73"x98"
Fabric requirements:
Border 2 yards (3 yards if cut lengthwise)
Darkest and Lightest: 2 yards
Two Medium values: 2.5 yards
Binding: 5/8 yard
Backing: 5 5/8 yards

Queen - Approx 97x110
Fabric requirements:
Pieced Border
Light: 2 7/8 yards
Dark: 2 7/8 yards
Dark Inner Border : 1 1/4 yards
Light Inner Border: 1/2 yard
Center
Darkest and Lightest: 1 5/8 yards
Medium Light : 1 1/8 yard
Medium Dark: 2 1/4 yards
Binding: 1 yard
Backing: 8.5 yards

King - Approx 110 x 110
Fabric requirements:
Pieced Border
Light: 2 7/8 yards
Dark: 2 7/8 yards
Dark Inner Border : 1 1/8 yards
Light Inner Border: 1/2 yard
Center
Darkest and Lightest: 1 7/8 yards
Two Medium Values: 2 3/4 yards
Binding: 1 yard
Backing: 9.75 yards
I'm entering this design in Phase Two of the Red and White Challenge - Design It! I hope you'll check them all out.
Have fun!!


