
 Welcome to the second day of Kick Off Week
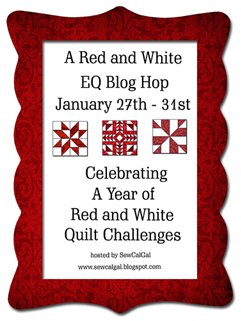
Electric Quilt Red and White Theme Blog Hop
Celebrating a Year of Red and White Quilt Challenges
We're kicking off
the Year of Red/White Quilt Challenges. Participants in this hop love
using EQ to design and we hope to inspire you to also use EQ Software (EQ SW) and enter the
upcoming Design It! Quilt Challenge that kicks off on February 10th and goes
thru March 23rd. Designs of any size can be entered in this challenge,
but they need to be your own design and have a red/white theme to them.
Of course, you need not use EQ SW to enter your design, but we certainly enjoy
using EQ to design with. There is also a Make It! Challenge for those
that want to make their own design or a project from any purchased design or
tutorial, as well as 3 different Red/White virtual quilt shows that you can
enter. And, the more challenges in the year that you enter the more
chances you’ll have to win prizes.
For more info on the Year of Red/White Quilt
Challenges: http://www.sewcalgal.blogspot.com/p/redwhilte-quilt-challenge.html
Here is what I want to share with you today:
Ever need to just get a quick project made with minimal inspiration?
I want to show you several tools in EQ7: QuickStart Project, Vertical Strip Quilts vs. Horizontal Grid quilts and a bit of 'fussy cutting' of fabric in the border.
Quick Start Project:


Selecting 'Layer 1' tab in the lower left will allow you to re-color to your choice.

Since we ultimately want to have a red and white quilt and the quick start project doesn't really have a good variety of reds in its local fabric library, you'll want to bring some in from a project or from your general library. You also can just use the 'colors' tab and do it as solids to get the desired effect. Doing it in a gray scale will also help you get the design laid out well and then matching the value of reds to the gray scale will let you place the reds appropriately.
Libraries - Fabric Library - EQ7 Libraries - by Color and choose the various red libraries and browse through them selecting the various fabrics you'd like to play with. Dark Red, Grey Red, Red and you need some White as well. I chose a few that were real white and some with a bit of red in them too. Each time you click on a fabric, then click 'Add to Sketchbook' (lower right of the wizard).

When complete, close the library and now those specific fabrics will be in your project fabric library.
To quickly change the colors of the project, there are a couple of ways to do it.
1. If you want to just swap a fabric, use the SWAP icon on your tool bar --highlighted on the right below (next to the bottom icon)
select a fabric swatch and then click on whatever color you'd like to swap it for in the entire quilt.

2. If you want to change the number of colors or the order of colors or not duplicate the same color in another strip, then you may need to use another method. To re-color the quilt with this particular layout, select your fabric swatch, hold the Alt key down and select a particular vertical strip. It will get half of the vertical zigzag. To get the other half click on the remaining portion holding the Alt key down and it will then have the specific color throughout the entire zigzag.
There are multiple ways to draw a similar design which can also result in a different construction method. The one above you'd be sewing triangles together in a strip and then sew the strips together. What if you wanted to just sew Half-Square Triangles (HST)? How would that look in your drawing?
It is a different type of layout, called a 'Horizontal Quilt'. To draw this yourself, go to 'Quilt...New Quilt...Horizontal.
Layout parameters will depend upon how big you want to make your quilt. So, choose your number of horizontal and vertical blocks, and the size of your blocks. You'll need to create one HST block in the 'Worktable....Work on Block. Draw a diagonal line from the upper left to the lower right corner. Save to the Sketchbook.
Go back to your quilt...'Worktable...Work on Quilt'.
Select the block you've just made, hold the Ctrl key down, and click in a square on the quilt. The entire quilt should now have the block.

In order to create the zig zag, every other block needs to be 'rotated' until you have the effect in the zigzag that you want. This particular shape gives you a lot of options to create a variety of striking designs. Have fun experimenting --here is a simple one.

The same grid ...but an 8 x 8 grid instead of the 4 x 4 above, can create a Carpenter's Wheel and on the right a pinwheel spiral all out of HSTs !!


If I start on the right hand column, rotate once, every other block all the way down that column.
In the next to last column, rotate the first one twice, and the next one 3 times; then twice and the next three times. Continue to the bottom. The next column over will be like the far right column. Continue doing this every other column and you'll get the zig zag effect. Perhaps the construction technique of making HSTs is easier for you--you can still get this zig zag effect.

To remove the 'block and patchwork' lines, hover on the quilt and 'right click' with your mouse. Uncheck the Outline Patches (any markings within the block) and Outline blocks (the actual outline of the block).

To change the colors to be the exact color that you'd like for that zigzag, select your fabric, and start clicking on each colorset that you want to change. This is a bit more tedious than in the Vertical strip quilt.
After experimenting, this is what I came up with using the Vertical Strip Quilt layout. Using a variety of red/white fabrics and a great Monochrome (by Jinny Beyer for RJR Fabrics) border. Using the fussy cut tool and the rotate fabric tool (lower right --they do not appear in the default installation setting, so be sure to 'add the buttons' if you need to), I maneuvered the border fabric to get this symmetrical effect.

This one will come out as a 48" x 60" lap/kid size--a great size for a 'Bag of Love'. I've rotated the image for illustrative purposes.

Fabric requirements as identifed in EQ7:

It only took me a couple of hours to sew the center together and I only needed about 14" x WOF for each of the 4 center fabrics because I chose to make them Quarter Square Triangles and then sew them together in rows. This keeps the long edge NOT on the bias. I then started playing with border ideas and ran out of time to blog about it here.
Here is the center during construction and the start of my border tryouts.


The actual fabrics used in the center are available in my studio.
You're welcome to request a kit if you'd like. -Several have asked about prices, so I'm updating the blog post now to include this image and info.

Only the top fabric is a wideback. If you’d like a
yard of each or some equal quantity of all 6 (would include the 1 yard x 3 yard
wide back) then I’ll offer them for $8.75/yard. This is price is good through Feb. 2 on a first come, first serve basis.
SNEAK PEAK note: AQS is coming out with a Red and White Quilts Book and I've been asked to quilt two of the featured quilts. Follow along on my blog for some additional sneak peaks of my quilting progress before the book is available.
The American Folk Art Museum posted photos here of the 2011 exhibit while it was under construction. Very inspiring!
Thanks for stopping by. Hope you've been inspired, learned a thing or two and will consider participating in the Red and White Quilt Challenges coming up this year. Maybe I'll get this one entered! Check out other participating blogs during the hop below:
Monday, January 27th
SewCalGal – www.sewcalgal.blogspot.com
Heidi/EQ Blog – Behind the Mouse, the Electric
Quilt Blog http://doyoueq.com/blog/
Tuesday, January 28th
Marlene/Kissed Quilts - http://kissedquilts.blogspot.com/
Wednesday, January 29th
Connie/Freemotion Quilting By The River - http://www.conniekresin.com/
Thursday, January 30th
Bea/Beaquilter - www.beaquilter.com
Friday, January 31st
Raewyn/Love to Stitch - stitchingfarmgirl.blogspot.com
These are wonderful inspiration. Makes me want to go to my machine and start stitching right now.
ReplyDeleteGreat, easy to follow directions, thanks for taking so much time to write them out! Great quilt too!
ReplyDeletelooks great! HST's are GREAT :)
ReplyDeletehow much are the kits? barbara babscorbitt@gmail.com
ReplyDeleteLove all your designs and tips. I've always been partial to the Carpenter's Star and you've now inspired me to make one in red/white. Gorgeous. Love your fabrics too!
ReplyDeleteSewCalGal
www.sewcalgal.blogspot.com
What a great post Marlene with lots of little tips! Beautiful quilt and fabrics!
ReplyDeleteThanks. I learned a few new EQ7 tricks today.
ReplyDeleteWow! I had no idea that EQ could tell how much fabric your project would require! Awesome!
ReplyDeleteA full and informative tutorial - thank you very much! I love the quilt you have made.
ReplyDeleteGreat lesson. I am eager try this when I get home.
ReplyDeleteSharon K
Love your tutorial. Lots of great info! Will be back for sure.
ReplyDeleteThank you. I love your Carpenter's Wheel, and it's given me an idea of what to do with a bunch of red and white HST's I have left from another project.
ReplyDeleteI am in love with all these red and white quilts. One of my favorite that I made is a red and white double Irish chain
ReplyDeleteThanks for the tut...
ReplyDelete