
Today I wanted to write about the Feathered Star - block #35 in our set of 36 because it pushed my own envelope in EQ7 and thought I should share it with all of you. The star that she chose is actually an Etoile de Chamblie from Prize Winning Designs ca. 1931, also known as Star of Chamblie, from Hall 1935. This is taken from Jinny Beyer's "The Quilter's Album of Patchwork Patterns", p. 270--an excellent resource.
This is Leila's block

Her tutorial helps us learn set-in seams, etc. This particular version of a feathered star is not in the EQ7 block library, so I had to draw it myself. Getting out Jinny's book helped me to understand it is a 38x38 grid. Placing the 19x19 transparency grid overlay on top of the image in the book I can then setup the grid in EQ7 and draw it myself. Yes, the 19 x 19 isn't 38 x 38 (but it is half x half), so if something falls in the middle, then you know it is 1, if it falls on the line then it is 2 over from the prior line or the appropriate multiples between lines.

Here is how to draw it in EQ7
Block- New Block - Easy Draw
Set the size of your block: 12" x 12"
Grid Snaps 38 vertical and 38 horizontal --only 19 x 19 will show up, which will be just like the grid
I set my graph paper cells to 38 and 38 as well.
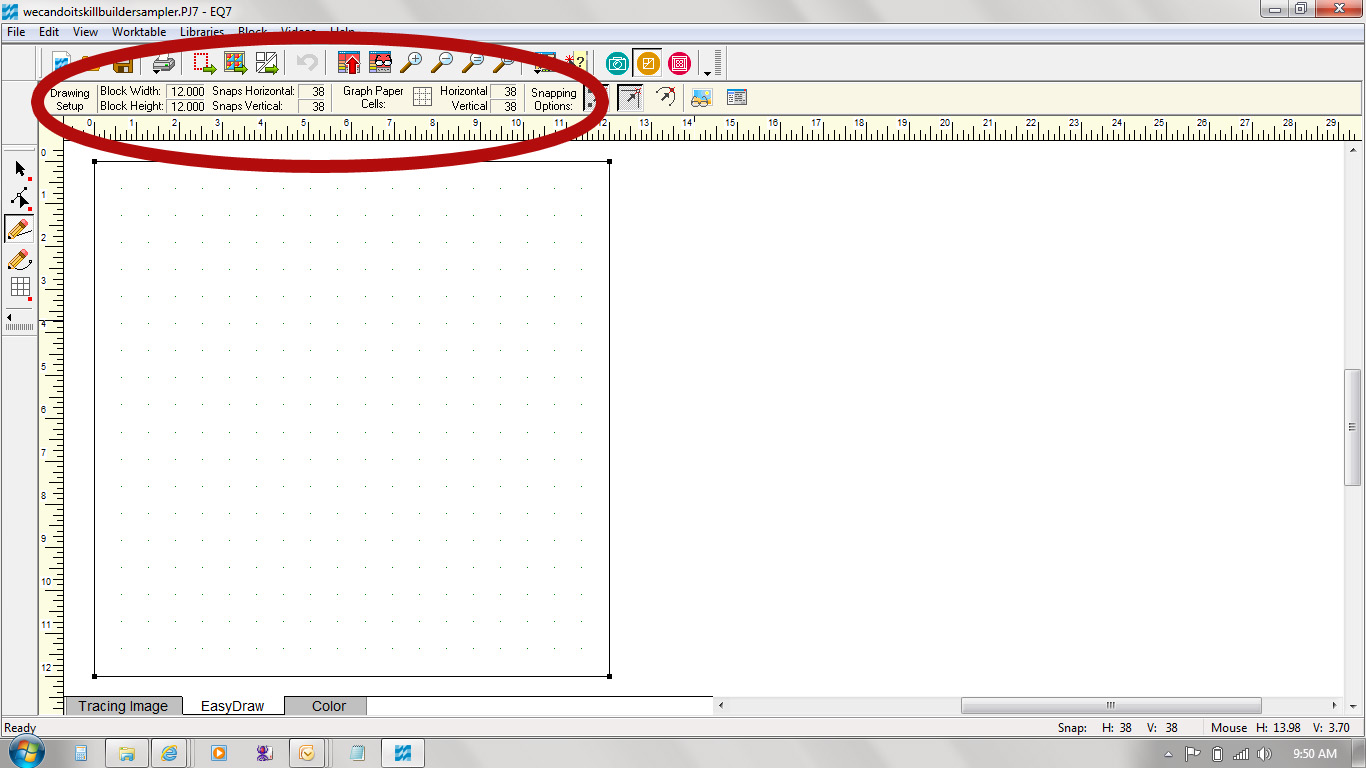
If you then turn on the graph paper, you'll see the 38 x 38 grid.

The following instructions do NOT have the grid lines turned on, so when a grid line is referred to, it is the dots that are on a 19x19 grid. With that many gridlines (38x38) I find it a little bit difficult to visually transfer the design. You can always switch it on and off and check that you've got it right.


You can now add the feathered elements.

Notice that the corner feathers are different than the middle feathers. Thus the red and blue lines to show the difference.
The final step is to remove the vertical and horizontal portions in the flying geese sections so that you can use a larger single piece of fabric. Compare this image with the one above to see the removed elements. Use the select arrow, click on the section, and then hit the Delete key.

Here is my coloring for now.

By drawing this out in EQ7, you can print paper piecing sections (PDF - print 4) and get a crisp result. I have 'moved' the sections around so that the printing is clean per page (i.e. no sections print over multiple pages). I recommend printing on Carol Doak's Foundation Papers.
My suggested sewing for assembly is shown below. Make 4 of these 4-piece sections and have the center piece cut out as well, then assemble. The page of foundation printing are these 4 sections. Repeat it four times.
If you have EQ7, you can experiment with other groupings by using the 'Start Over' button and then grouping them how you think you'd like to sew them together.

Leaving a partially sewn seam between sections 1 and 2 when attaching to each other and coming back to finish it after bringing the other 4-piece section to it will be important. The center section may need to have partial seams as well, but there are no "Y" seams to 'set-in'! Yeah!! My objective has been achieved!! :-)

Here also is a PDF of the rotary cutting. This might help if you want to know sizes and overcut them for paper piecing and then trim as you would normal paper piecing. The key is the center block which should be 4 5/16" square.
I'll add a photo of the block when I physically make it...but for now, I'm excited to have drawn the block and figured out a way to assemble it without "Y" seams!
Let me know how it goes if you choose to do it this way.
This is great! I'm having trouble getting EQ to remember all my lines on a simpler paper pieced design. I think it's operator error and may just start over again. Going to read all your EQ posts though before I do!
ReplyDeleteSometimes if the lines aren't connected they will disappear when saving the block.
DeleteI am new to EQ and really don't know much about computers. Still working my way through the PDF files. I am going to start following you cuz hopefully you will keep on giving these tutorials later! I need them. Bookmarking this for when I get done with the pdf lessons!
ReplyDeleteThis has gone into my "EQ7 Notebook" of things to reference when I get to that level of use. I'm new to EQ and trying to learn all that I can. You have contributed greatly to my learning, so I do thank you so very much!
ReplyDeleteKay in NJ
I used this to make the block #35 in the sampler. The paper pieced templates were excellent. The layout must be while looking at the paper side. I took off all the paper before I sewed them together and it was difficult to follow. Otherwise it was great and much easier that inset/y seams.
ReplyDeleteI usually leave the paper on until the block is completely sewn together. Glad it worked!
DeleteThank you SO much for the paper templates! I was dreading the y-seams. :)
ReplyDeletekquiltz in Arizona---you talk about copy and paste???? Please explain this
ReplyDeleteThe feathered elements as colored 'red' or 'blue' can be 'highlighted', then copied and pasted, then rotated (45 degrees) and moved into position. You don't have to do that. You can individually draw each line. I just wanted to show that you could which makes it a bit quicker to draw all of the little lines.
DeleteI just found you tutorial. Thank you!! That is REALLY helpful!
ReplyDeleteAmazing! I have to admit when I first read the block size I thought you might be out of your mind (lol), but felt better when I saw it was paper pieced. Ingenious, thanks so much!
ReplyDeleteThanks a lot! That is very clever and I really liked learning it!
ReplyDelete