Thursday, January 10, 2013

A block - two ways - with fussy cuts - great results!


The colorations of a block can make all the difference.

Do you remember this one? It was the January Jumble block from EQ's Block of the Month in 2011.

These are the same blocks, just colored differently. The second block also has some very fussy cut pieces in the flying geese and the center square.


If you take these two blocks and alternate them in a quilt, this is the result!

 
I originally posted about it here.
 
So, how do you work with those fussy cut pieces in EQ and get an irish chain effect with just two blocks?
 
First, lets talk about the irish chain effect. The colorations in each block create the illusion. Note that the darker green is only in the corner of the second block, and has two squares in each corner set in the first block. By choosing three different greens in these clusters between the two blocks, you will get the irish chain effect in the quilt.
 

Because of the darker purple on point squares in the first block, the white background in the flying geese becomes part of the block that it is next to. This allows the second block to have a cut ribbon effect or star.
 
The particular fabric chosen to 'fussy cut' creates a lace effect. This influenced the name I have given the quilt -- "Irish Violets and Lace"
 
There are a couple of important steps in working with fabric that you want to intentionally use within a quilt based on its pattern or motif.
 
The scale of the image must be true to the fabric print. I have found it easiest to use Adobe Photoshop to manipulate images. There are other programs out there as well.
 
If you find an image of the fabric online that includes a ruler next to it (shops often post fabric images this way), these are the easiest to use because the true measure/ruler/scale is already there.
 
Open the image in Photoshop, then choose the Image....Image Size (Alt-Ctrl-I). The resolution should be set at 72 pixels/inch. Based on the ruler in the image, set the height or width based on what the ruler shows of this entire image. 'OK'
 
Then using the crop bar, crop to the best repeat. Save the image as a .jpg
 
Within EQ, go to Libraries...Fabric Library....then select the 'Import'...'from Files'. Choose the file, from where ever you saved it on your computer. Then, 'Add to Sketchbook'.
 
Now the new fabric will show up in your Fabric Library.
 
Sizing the blocks you're working with may be necessary in order for the fussy cut fabric to work well within the design. Primarily it is important for you to consider the effect that you want the fussy cut fabric to give the design.
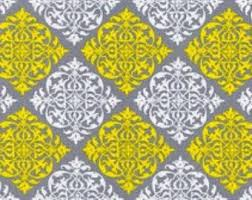
In the fussy cut fabric example shown above (Summer Soiree by Paula Prass from 2009) I wanted it to have a lacey effect. This particular fabric is out of print, but I've found a few recently that are more readily available. like this one, by Deb Strain for Moda, 'Tend the Earth'
or this one Black and White Black Linda Lace


To apply the fabric into the block and then move it around so that it creates the effect you desire, you have to use a couple of key tools.

Be sure that your Design Toolbar is visible. 'View' ..'Toolbars'...'Design Toolbar'.

Do you see these icons:
 
 
If you do not, you'll need to Add them to the tool bar. At the end of the Toolbar is an arrow that allows you to Add/Remove Buttons. Use that link to add or remove buttons as you wish.
 
Once they are on your Design Toolbar, you can then hover on each and see what they are intended to do. The red one allows you to move the fabric within the space you have placed it. The green icon allows you to rotate the fabric. There are options on how much it rotates on each click that you can set. It defaults to 90 degrees.

Hope this will inspire you to use some special fabrics and design with intentional use of the motif to effect the overall result.
 

Wednesday, January 9, 2013

WIP

In the throws of logistics with moving, house hunting, etc. I'm working on my Skill Builder Sampler quilting.

Here are some progress photos. I've stitched out some silver metallic thread, all red (border now done!), black and some navy blue. Still have to finish the navy and do white and yellow.


A local quilt shop has asked for this to be presented as a BOM program. It will be called Rosie's BOMb! Follow along for details as they become available.


Stats for 2013:

Completed: 1  (Rose of Hope ....see the write up here). 

In Progress: 9

Tuesday, January 8, 2013

First finish of 2013

My first finish of the year....thought I'd finish this a week ago (as in last year!), but didn't quite get it done.

This is 'Rose of Hope'. See below for proof the binding is done. There was sunshine on the day I was at this point in the process and there hasn't been since, so this is the 'full' photo that gives great detail on the quilting. The binding is out of the same outer most border fabric. I stitched it on the front by machine, and folded over to the back and stitched down by hand ...I know (not my norm)...but felt this one warranted the hand work.


Back in 2009 do you remember the Rose of Sharon EQ Block Design Contest? The original contest encouraged us to think outside the box in using a fixed set of shapes in a fixed set of sizes. Most blocks submitted were of more typical rose of sharon styled blocks. This bird one was definitely outside the box! I realize that the story of Noah talks about a bird and an olive branch, but this image still makes me think of that story. I chose to use a rainbow effect in the borders, because a rainbow was seen in that story to remind us of God's promise. The first and third border are mitered and have darker sides to try and present an illusion of perspective looking through a thick wall and out through a window where the bird is seen flying by. Kind of like the walls of the ark.


There are two layers of batting, cotton on the bottom and wool on top to provide loft in unquilted areas.

The applique is stitched around, some are filled in more densely than others. The 'cloud' quilting is inspired from a fill sample by Gina Perkes in her newish book. The brown border with scrollwork I wanted to have a little pizzazz so incorporated the designs, echoed them once about 1/8" away and then did a woodgrain background fill around them. I hoped it would give the effect of carved wood. A woodgrain fill in the medium brown and light brown border. I tried, but could have been more intentional to stitch the 'further' away sides tighter and the 'nearer' sides less dense to help in the illusion of the perspective. They are only subtly different and could have had more exaggeration. The very outer border was sort of an experiment. A squiggly frame, echoed, and pebbles all around to fill in. The pieced rainbow borders are only ditched on the inner and outer edges (not at each pieced seam). They really pop up because of the wool batting and no quilting on them.

I blocked it by pinning it onto insulation board and then steaming it. The center block was done long before I became so aware of batik bleeding fabric and I think the lower right leaves would bleed if they got wet given my experience on a quilt recently that I am pretty sure used the same fabric. I think it was a hand-dye that I acquired sometime in the past and was just sitting in my stash. It is now laying fairly flat, so am happy with it to just be this way and just be a wallhanging. It finished at about 38" x 38".

The center block, blown up to 15" is originally one of my design entries to the Rose of Sharon EQ7 Block Design contest back in 2009. It was one selected to be included in Nine Patch Media's DVD. (Their website seems to be going through some construction at the time of posting or you'd see a link here).


My basket block was included in the book that they published as well.


The wallhanging I put together for that was auctioned off at our local festival and all proceeds went to the http://www.alzquilts.org/
 
Progress on the new studio is continuing. During the Christmas week, my husband and I created a scale model in gingerbread. Andies mints are the bricks, red hots and lips are on the door, a gingerbread tree and extra branches using guacmole chips. The other three trees are using tootsie rolls for trunks and guacmole chips for branches. The 'green' grass is made from sour green apple 'belts'. The shingles used special cuts from mocha covered waffle textured wafers. The same wafers were used (prior to being cut in thirds) for the walkway. The rock formation is made from Costco special almond toffee. Snow was made using a frosting made with meringue (I found it by looking up "frosting used as cement"). A fun time!


Happy New Year!

Wednesday, January 2, 2013

WIP 2012 Recap

From original 2012 list, here is what I finished

EQ 2011 BOM became 'Spinner' and won the layout contest hosted by Electric Quilt, also juried into Pacific Northwest Quilt Show and got a 2nd place ribbon at the Washington State Quilter's Show in Spokane, WA for Machine Quilted, Pieced, Solo; and is now juried into Road to California 2013!

Christmas MugRug
Charmed Network - 'Terrain' version ** NEW PATTERN **
Charmed Network - 'Eva' version ** NEW PATTERN **
BMCU Table Runner/Placemats/Mug Rugs
Irish Hand Block
McCall's Mystery Quilt - Spring Fling version (had to post a pic of the back too)
McCall's Mystery Quilt - RazzleDazzle version (had to post a pic of the back too)
Tulip wallhanging re-quilt (I did add this back on from 2011)


Added to the List and got finished
Linda Taylor's class project from fall MQX 2011
Hearts & Flowers Coordinating Mug Rug
Zoe -Summer School version
Zoe's raincoat
Sashiko potholder (class from Pepper Cory)
My Olympic Connection (in memory of my grandfather)
STEP on Life's Journey (donated to local women's shelter and made with our Fearless Design block swap)
Working with What You've Got (WWVQG 2009 co-chair blocks and wedding FQ basket)
WWCHS - Home Sweet Home
Kitchen door curtain


Still in progress
(from lower left counter clockwise)
-Rose of Sharon Bird Block (just binding to go)
-Skill Builder Sampler (on quilting table now)
-OWN (only 1 block this year)
-2007 Alaska Shop Hop
-Out of the Darkness


Added and in progress
  • Irena Bluhm Colored Pencil class project (finalize colorings and textile medium to be applied)
  • Valentine Jelly Roll Race (ready to quilt)
  • Honeymoon Storm at Sea
  • Fall Wallhanging
  • Christmas Friendship Star Block Lotto win in December


No progress --it just didn't happen!
Basket BOM (ready to quilt)
Peace Park
Snowflake/blizzard
2007 Shop Hop the Blues
2009 Shop Hop the Blues


Although my new studio is prompting me to organize my time differently yet again, the 10 pieces above that are not finished yet are going to be what I want to work on in 2013 ...for myself, when I have the time. There were two from 2011 that are still sitting around and I really ought to pull them out and finish them up too (mini lonestar and colorwash heart duvet which will become a quilt). I'm thinking it might be better this year to have business goals that are my priority rather than my personal WIP being the driving factor. We shall see how it all pans out, but it will be an exciting year for sure!

On the business front I've got several designs in the works that I'd like to see materalize. Being in a new locale, my mind is swirling around ideas that will symbolize the beauty and happenings here.

Maybe this will be our Lucky 13!! Happy New Year!
 

Monday, December 17, 2012

Design Wall Monday

This last week at our local quilt guild meeting, there were lots of block lotto entries. I had done four blocks, so thought maybe I'd have a chance, but I knew others did that many too.

Well, actually at least the two I know had four blocks in the drawing, each got our name drawn, so we split the blocks kind of based on 'cream' vs. 'white' neutrals used in the blocks. The count must not have been accurate, as I thought I was to take home 12 (my name drawn first) and the other gal would get 10 (as instructed by the organizer). Well, at home I counted 17 blocks. So this is what I've come up with, and think that some sashing and setting triangles w/a border should work out.

I've got a 'light' star too many, and need a 'dark' green star, so maybe I can swap with the other gal...depending upon what she might be designing, or just make another one myself (see fabric below). I also feel bad since her four blocks were in my pile, so have offered to give 'em up if she's yearning for them, but I had told her at the very beginning that I absolutely loved the fabric in her blocks, so I don't really want to give them up!

Another friend suggested using some pine needles and pines cones fabric to unite these blocks. I liked the idea and believe I have some fabric in my stash I might be able to use. This would make it not overly Christmas'y'.

Far left...the first two might be the extra star block I need to make, the light background pinecones the setting triangles on the sides and top (maybe need more of the next one instead); the dark green in the middle the corner triangles; the all pinecones the cornerstones; and the far right green w/pine cones the sashing.


Here is my EQ7 draft. Don't have the exact fabrics....but a rough idea. An outer border could be added too if I found some more fabric.


I've got one more client quilt that needs to be done 'before Christmas'. Hoping to wrap that up today and then get on to some of my own goals to finish before the end of the year. The biggest is to move my studio, but I also have several things to quilt.

More Design Walls indexed here.

Wednesday, December 5, 2012

WIP

Finished
2012-#15 - McCall's 2012 Mystery v.1  - this version is being called "Spring Fling"

2012-#16 - McCall's 2012 Mystery v. 2 - "Razzle Dazzle"

2012-#17 - "Home Sweet Home" - This will be given to the Walla Walla Children's Home Society for their Sweetheart Auction in February. Blocks were made by "Just Us Quilters" Facebook group members. Thank you to all who participated.


2012-#18 -- started and finished yesterday. We needed some sort of window covering for the back door in our temporary residence. Based on the fabrics I happened to have already moved, this was what I chose. I wanted it doubled, and the print is fairly strong, so skimped a bit and seamed it together so that the pattern matches front to back. Although it should have a nice overhang to the left and right of the window, I would have needed another whole length of the window to make it appropriately. So...it is JUST to each edge. Better than nothing! My DH will get it correctly hanging once he gets home. For now..it is propped on top of the dowel holders.


Progress
  • Alaska 2007 Shop Hop, Block #9


  •  
    Started - Jelly Roll Race (used as a sample for a class I taught in Arizona last week).

    No Progress
    • Out of the Darkness -- ready for block #10
    • Honeymoon Storm at Sea
    • Oddie’s Wild Nature (O.W.N.)
    • Snowflake BOM win/Blizzard quilt
    • Fall Wallhanging

    Ready to Quilt

    • We Can Do It! Skill Builder Sampler
    • Rose of Sharon Bird Block Wallhanging - 'Rose of Hope'
    • Irena Bluhm - colored pencil class project
    • WWVQG 2006 Basket BOM

    2012 WIP Stats:
    Completed: 18
    In Progress: 11

    Check out other WIPs at Lee's Freshly Pieced Linkup. Click the WIP button in the righthand column.

    Monday, December 3, 2012

    Design Wall Monday

    The saga continues as we wait on logistics for our move. This week I forgot my power cord for my sewing machine, so not much to show you today.

    While in Arizona last week visiting my parents, I was given the opportunity to teach a group at the Apache Junction SDA Church that regularly meet on Monday mornings to assemble 'Bags of Love'. Each bag includes age/gender appropriate items and a quilt and are given to local agencies, including Child Protective Services, to be given to a child when they are removed from a home for whatever reasons. This bag is then the child's very own bag to keep with them. I showed the ladies how to make quilts with Jelly Rolls, i.e. 1600 Jelly Roll Race. I compiled many examples that I found online to inspire their creativity and they cut scraps from their stash in order to create a Jelly Roll. If you've not made one, just google 'jelly roll race quilt' and you'll get several tutorials. Basically about 40 strips of 2.5" x Width of Fabric strips or the equivalent from your scraps. If they are all the same length, cut the first one in half (roughly) and return one half to your stash and then get going. Sew them end to end in your desired method (straight or diagonal), add a separator if you'd like with a length of your choice (i.e. choose a zinger from your stack). One they are all end to end, fold and sew lengthwise together. I found sewing from the folded end easiest so it will untangle at the other end if that is an issue. If you are neat and tidy you can fold it carefully, but remember you're folding two lengths of 800"! A challenge for some ;-). Do the fold and sew lengthwise a total of 5 times. Border if you like.

    This is the one I whipped up before showing them how it is done. I won this Jelly Roll from a Quilting Gallery weekly themed contest earlier this year. The fabrics are by Deb Strain. In my stash at home is also enough backing from one of the fabrics.  A white background with red print (9th row from the bottom, not counting the border). The border was made with the 3 strips in the Jelly Roll that were tone on tone red, cut in half lengthwise.

    Since I did put separators in (the red with white print ~ 5" cut strips) I'm wondering if any applique would be appropriate or not. I was thinking a heart bouquet type of idea, one friend has suggested, do nothing more. Want to weigh in on this? I'd love your feedback. Perhaps if I had not put separators, applique would be more appropriate.

    Does it need another border?


    Here is the one I did during our session. I used a 20 piece jelly roll that I won as part of my McCalls Design Star 2011 participation and added another ___ fabrics that coordinated. Chose the chartreuse as my zinger which got cut in different directions inadvertently-ah well, and had a couple of different lengths in the stash collection. I believe there was enough in their stash to back and bind with the dark turquoise used in the border. The top and bottom 'border' are really part of the race strip, so just added the two on the side. I must admit that when I originally finished this one (without the borders) I did take a couple of strips apart and switch a few rows around to get this exact effect. I thought the zingers helped to make this look like a huge "S".

    Below is a photo of some of the tops. There were a total of 10 sewing that day. Three of these (2 on the table and the far left) got to this point during our session. The other 3 in the back row were finished later and brough back a couple of days later to be included in this photo. They all seemed very excited to have something so simple to do that they can talk while they are doing it and quickly get quilt tops put together with the mostly donated fabrics that they have received.

    They are now strategizing how they can trim them to the size they normally make (48" x 60") and utilize the scraps for the pockets on the bags so that they coordinate.

    You can see the door is open (far left) to their well organized stash closet. And the items hanging in the background center and right are up as part of their craft sale. They are open each Monday in the first weeks of this month and their proceeds go to pay on a loan for the school building that the church supports. Very popular items include the World and US map quilts and the purses that they make with lots of pockets, are self-closing and have an adjustable strap. I gave my mom some really nice red leatherette embossed fabric and we found some cute lining at a shop while I was there so that she'll make me another one. I think I got her enough of the leatherette she'll be able to make herself one too (red is her favorite color!). I think she'll line it with the gorgeous iceland poppy fabric I brought to her from a special sale. From all of their production of goods, they have raised quite a bit of money. Maybe my mom will comment on this blog post with their efforts. It really is quite amazing what some (mostly retired) industrious souls can get up to!

    The day I returned later in the week to take this photo, our primary reason for meeting was to learn how to use a Handi Quilter frame. Their main challenge now is to find a machine with a decent throat size so there are more than 3-4 inches of quilting space. But...we got it all working, so hopefully they can have fun perfecting their new skill.

    Although I have no power cord to sew, today is a big milestone for us. Later we'll sign the closing papers on new commercial property that in the near term will house my long-arm machine quilting service.  I hope to get the renovations done by the first of the year. On Wednesday, I'll post a 'before' photo!

    More Design Wall's at Judy's Patchwork Times.