Thursday, February 20, 2014

Red and White Experimentation

Before getting started on two red and white quilts that will be part of an AQS Red and White Book, I decided to play a bit on one of my own.

After taking a picture of the quilt top and drawing on my print out....I started with my vinyl drawings and then went for it. If you look closely at the very outer edge of the red and white border print ...that was my inspiration for the triangles and heart shape flower motif in the white borders. I used the points in the border as registration spacing. Since the side borders are longer than the top and bottom, I had to do a little symmetical sizing right at the middle of the quilt so that the eye continues to move around the quilt.

Outer Border


On the printed Jinny Beyer Monochrome border print, I used the printed motif itself as my guide for quilting 3 separate passes to outline various elements of the motifs. A very busy print, so just get it quilted sufficiently.
 
Inner Border


When I got to the right inner border, my brain flipped where I was putting the heart flower motif. Whoops! I debated whether to leave it and add it all the way around or take it out. I was liking the triangles left UNquilted. I considered letting the right and bottom inner borders be opposite, but ultimately I went ahead and stitched how I wanted it to be and then removed the 4 'outer stitched' elements afterwards. This way I saw what it looked like if I had done it both ways. A dab of water after removing the thread and it looked as good as never stitched.


I wasn't so sure how I wanted to quilt the zigzags and chose to let the fabric help me out a bit ... maybe too much. The two medium value fabrics were quite busy so it wouldn't have mattered too much what I did with them. Took the opportunity to practice a feather with pearl stem and lots of bubbles. I came back and did the red parts at the end since I had started out with white thread on the machine.


The lightest zigzag had small red circles. This quilting doesn't seem to fit the design at all, so isn't a good choice, but I am glad I tried it anyway. The second iteration went much better and I was able to do the entire set in one pass with the exception of the inner circles.
The middle red motif is taken from the red printed border kind of a fleur de lis shape. The swirls in the upper portion of each are too tight to see relative to the background quilting. The lower red elements I put the same heart flower motif as was in the border and an 'S' in each corner. In this picture you also see the mid-point of the quilt so the borders are adjusted a little bit 'long' on the triangles at the mid point to accomodate the sizing.


Here is the backside. I'm saving a full front view for later in the year as part of the  Red and White Challenges.


So...I hope I've got my mojo sufficiently back to get going again. Next up...the two red and white quilts. Come back for some sneak peaks next week.


Monday, February 17, 2014

Celebrating our Love

On Valentine's Day, my husband and I celebrated our 5th wedding anniversary. Yes...we were sappy enough to get married on Valentine's Day. When we first started dating, there were two things he asked for ...some day......a short engagement and he wanted to wear tails. So, when we got engaged during a Thanksgiving weekend the year before...it seemed that given my then school schedule (I was the Associate Dean of Engineering at a University), February might be the best time to get married...well, Valentine's Day it was!! Although you can't see his 'tails' in this photo, he was wearing them. It set the 'tone' for the wedding..quite formal (he is of British heritage), so I thought of Princess Diana's wedding and some of the unique elements that I really liked, one being the signing of the marriage certificate during the ceremony.

Unfortunately I caught some sort of bug while in Arizona last week and so it ended up being a quiet, trying to recover, weekend at home.

I was notifed by SewCalGal that my comment was randomly selected to win the EQ Stash Download from the Red and White Challenges Kickoff Week Blog Hop with inspirations on how to design red and white quilts in EQ. Their new way of delivering the Stash is AWESOME! No need to wait for it to arrive in the mail, just a quick download and you're off and running to design with the latest fabrics from manufacturers. It is even priced lower than the older versions. yeah!!

I've still got until March 23 to get a red and white DESIGN (Phase 2) entered into the current Red and White Challenge! I had not made a red and white quilt before this year so didn't enter anything into Phase 1 (quilts made before 2014). There were several beautiful quilts, they are worth checking out. Maybe you will be inspired to design one!

This past week I did get one little block quilted. It is for a name tag to the guild I recently joined in Republic, WA, "Piece 'N Pals". Tried out some of the ideas learned in Judi Madsen's class while at AQS. Freehanded the name stuff and tried to mark the colored triangles, but it got a little crazy ;-) Important to try things before working on paying customer work when it really counts.

Even using 12 spi I can begin to understand why Judi likes to use an even higher spi #. Her work is so detailed and dense.


Before I sign off...just want to feature a quilt I designed a couple of years ago, but thematically is appropriate and fun to reflect on.

This is Mi Amore. A quilt a designed as the final challenge in the McCalls Quilt Design Star 2011. Our challenge was to take a popular song and be inspired. Various love songs kept coming to mind, but not one in particular. My husband has been so supportive of what I am doing and I wanted to honor that love. There was a song popular back when I was in college called Mi Amore, so I went with that one as the name for the quilt. The design is meant to represent the sound coming from a speaker when listening to those love songs. I enjoy trying to create a 3d illusion and the ombre in these cotton sateen fabrics provided the gradations of color value that worked great. I did use a solid dark red sateen for the darkest red, but could have easily used the darkest red from the ombre to make this work.

You can get this pattern as a PDF download at Craftsy.

Those who tested the pattern have had fun creating it in different combinations of colors and themes. Here are some that went different directions than the hearts. It definitely has an industrial feel to it and is easily made into a 'guy'/'boy' quilt. If you make one...I'd love to see it!


Oh ...one more exciting thing coming up in April ....I've been asked to be the vendor at a retreat April 4-6, 2014 in Mazama, WA. The retreat is hosted by Colleen Blackwood of Laughing Lizzies Patterns who teaches each year at the Sister's show and is a major player in the Krazy Horse Quilt show in Pendleton, OR. There are still a few spots available. If you're interested, just ask me for details or check out her website and tell her I sent you!

View Larger Map

Have a great week!

Sunday, February 9, 2014

AQS Quilt Week Phoenix 2014

What a fun time this past week in Phoenix, Arizona!

My parents live in the adjacent town, Mesa. This meant, that AQS Quilt Week was close enough I could spend a week with them, and include my mom in the many quilty festivities and help her out with her own quilt group.

Here are some of my highlights.


"Spinner" was juried into the show in the Wall Quilts - Traditional category. The EQ7 tutorial button in the upper righthand corner of my blog will lead you to how to draft this yourself if you're interested in making one.

I did mark 'stitch regulated' on my entry form, but did not enter it into the Computer Aided category as I couldn't imagine trying to compete with a Computer Aided --typically considered from a guided perspective--entry. This was quite a controversial subject for entrants with AQS's new category definition. Given the lopsided amounts of entries in various categories, I'm guessing there will be new definitions in 2015. Given the remaining shows of 2014...there might be some interesting options for people to consider. Winners were listed on the AQS site.

Here are the stats by my observation in the show and program:
...approximately 140 different quilters or quilting groups represented in the show; Categories/Description/# of juried entries:
100/BedQuilts-Traditional/36;
200/BedQuilts-Innovative/14;
300/BedQuilts-ComputerAided/5;
400/WallQuilts-Traditional/59;
500/WallQuilts -Innovative -Art /96;
600/WallQuilts-Modern/26;
700/WallQuilts-ComputerAided/14.

Unfortunately it did appear that some ComputerAided (not considering Stitch Regulation of which I'm sure there were many) quilts were in other categories, but the judges didn't move them. Seemed to be difficulty in maintaining the integrity of the definition within a category ...perhaps both on the entrant's part in choosing the appropriate category and the organization taking liberties to move a quilt if it has been entered into the wrong category. Sad when there is this sort of controversy. I even saw someone in person that had entered a quilt in a prior show (not AQS) that by all appearances was past its qualified 'show life'...but I didn't have the heart to talk with them about how that ended up (sure thought about it though).

Wednesday was the opening, and the first 300 people got cupcakes to celebrate AQS's 30th year. A former high school student of my mother's from the mid 60's is now a friend of hers here in AZ and came with us for the day. We enjoyed looking at all the quilts, finding brief descriptions of them in the program and reviewing the various exhibits that were included in the show as well. We walked through all the vendors, connected with friends I've made from being at various shows and tested machines--always got to take a little time to play and leave a little bit of stitching on their sandwich. Even saw Marci Baker from Alicia's Attic, The Tucker's from Studio 180 and Cheri Meinke-Johnson who does all the crystals (she had given me advice on 'Flutterbright' when I was at AQS-Knoxville, before I put the crystals on that auilg). I tend to walk these pretty fast and then return to specific booths, but since I had my mom and friend with me...I would walk two booths and typically have to walk back one and wait and then do it again. I should have worn my 'standing' shoes...not my walking shoes (HA!)

Thursday was an opportunity to sit in on two different author related events. Elaine --Executive Editor of AQS--spoke about solving the publishing puzzle...and at the end asked impromtply for me to share my own experience of how it came to be that I am publishing with AQS.  ahhhh....hopefully it came out ok! HA! A good experience for me though.

Late in the afternoon there was an Authors Roundtable with four recent authors with AQS, two who I follow on Facebook, newsletter and/or their blog (Linda M. Poole and Judi Madsen --Green Fairy Quilts). Fun to meet them in person and hear their stories. They answered questions about how their idea became a 'book', the process, good, bad, etc.  Somehow I helped them take pictures together, but didn't capture any on my own camera, so I'm linking to the picture that I took on Linda's camera that she posted!

Took a leisurely lunch at the local greek restuarant (My Big Fat Greek). Not a style of food I can get very often where I live now, so that was nice. After lunch one of my students/clients from the Grand Coulee area who is wintering in AZ arrived to see the show and catch up with me. We looked at some of the quilts and played more on various machines, visited with friends, etc. We got to enjoy a quick meal w/Kathy before she took off.

Thursday night my mom and I went to the Freddy Moran trunkshow - Red is my Neutral. My mom is always wearing red, so thought she'd enjoy how Freddy does red! Always fun to see how Freddy thinks and puts her art together. Lately, she is just using a glue stick and sends the entire top off to the quilter to stitch it together. She is over 80! Still a hoot! I was so pleased to be able to tell her the story of the first time I saw her trunkshow in San Francisco c.2002. The very first and likely only San Francisco Quilt Guild meeting I went to before moving out of the area. I had started quilting just before that and I was invited by a gal in my class to attend. Freddy's freedom of expression in her quilt designing gave me an early start to thinking outside the box.

Friday morning my mom took a class from Cindy Seitz-Krug. It was great to see Cindy again after meeting her when I decided to attend a local guild meeting in Bakersfield, CA in the late spring of 2012. She was the featured presenter at the meeting and it allowed me to get acquainted with her work. I have seen her quilts since then at APQS shows and has been a repeat winner in AQS shows.


Friday, my last day at the show, was met with great anticipation. I was going to take a class from Judi Madsen (Green Fairy Quilts). The AQS people had been talking about how this was her first time teaching and how excited they were to have her personality just bubbling over. She was teaching several different classes and I was going to take her Simple Marking, Fabulous Quilting class. With my red/white quilts due by the end of the month...I thought this would be perfect. I have always loved Judi's beautiful quilting and was excited for the opportunity to hear how she does it. The fact that her book was available too, was a double bonus.


Here is what I did in the class. The center flower mimics the design she put into one of her own quilts. Handi-Quilter provided the machines and we had two students per machine, so our blocks were loaded side by side and we took turns working through our quilting.


From Judi's quilt


I was able to pick up a bit more So! Fine Superior Thread spools in anticipation of my red/white quilt work when I get home.


Said good-bye to the AQS staff that I have gotten to know and headed out for a fun evening, reconnecting with a former boss from 20+ years ago during my 'international banking' days. Crazy!!! He and his wife met us at a restaurant in North Scottsdale. Wonderful evening catching up on our lives.


Saturday night I had a great treat....spent several hours with a dear friend who had quadruplets 50 some days ago. She has her work cut out for her once they get home. Two are out of NICU in a step down unit and two are still developing the necessary skills to survive. But daily progress is there. They are just so precious. If you want to read more about them, you can check-in at her blog http://family4tune.blogspot.com.

Been testing some more of our Skill Builder Blocks that will be going into the book. Here are some I've done while here in AZ.


Monday I'll be teaching in Apache Junction, AZ the zig zag quilt I put together from the blog hop a couple of weeks ago. My mom has a charity quilt group that she meets with weekly, so I'll be showing them this simple way to use some of their donated fabrics that they get. Red/White was the blog hop purpose, but if you turn it into 4 values and a nice border print, you could use any colors.

Looking forward to getting home and back to my piecing, teaching, and quilting. They have had very fridgid weather so haven't missed that and I've been enjoying 60's and 70's here --just lovely!

Waiting at home is my dear husband....we're looking forward to celebrating 5 years of married life on Valentine's Day!

If you're still reading...thanks for stopping by. It's been a full week!

Tuesday, January 28, 2014

Red and White Blog Hop

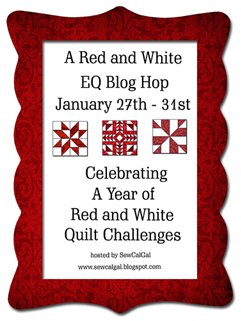
Welcome to the second day of Kick Off Week
Electric Quilt Red and White Theme Blog Hop
Celebrating a Year of Red and White Quilt Challenges

We're kicking off the Year of Red/White Quilt Challenges.  Participants in this hop love using EQ to design and we hope to inspire you to also use EQ Software (EQ SW) and enter the upcoming Design It! Quilt Challenge that kicks off on February 10th and goes thru March 23rd.  Designs of any size can be entered in this challenge, but they need to be your own design and have a red/white theme to them.  Of course, you need not use EQ SW to enter your design, but we certainly enjoy using EQ to design with.  There is also a Make It! Challenge for those that want to make their own design or a project from any purchased design or tutorial, as well as 3 different Red/White virtual quilt shows that you can enter.  And, the more challenges in the year that you enter the more chances you’ll have to win prizes.
For more info on the Year of Red/White Quilt Challenges:  http://www.sewcalgal.blogspot.com/p/redwhilte-quilt-challenge.html
Here is what I want to share with you today:
Ever need to just get a quick project made with minimal inspiration?
 
I want to show you several tools in EQ7: QuickStart Project, Vertical Strip Quilts vs. Horizontal Grid quilts and a bit of 'fussy cutting' of fabric in the border.
 
Quick Start Project:
 
When you open EQ7 there are 3 options, including a 'Quick Start Project' which is the 3rd tab in the opening wizard. I've shown the 'Streak of Lightning.TP7' as the starting point of my project.


This design uses the 'Vertical strip' Layout. By selecting the 'layout' tab (lower left) you can see the vertical strips and choose to set the width of each individual strip as well as the length of the strip. Using this quick project, there are 4 layout designs ranging from a twin size up to a king size. It may be helpful to choose the size you'd like and work from that one. The one below is the queen size.


Selecting 'Layer 1' tab in the lower left will allow you to re-color to your choice.
(the example below is from the king size layout)

 
Since we ultimately want to have a red and white quilt and the quick start project doesn't really have a good variety of reds in its local fabric library, you'll want to bring some in from a project or from your general library. You also can just use the 'colors' tab and do it as solids to get the desired effect. Doing it in a gray scale will also help you get the design laid out well and then matching the value of reds to the gray scale will let you place the reds appropriately.
 
Libraries - Fabric Library - EQ7 Libraries - by Color and choose the various red libraries and browse through them selecting the various fabrics you'd like to play with. Dark Red, Grey Red, Red and you need some White as well. I chose a few that were real white and some with a bit of red in them too. Each time you click on a fabric, then click 'Add to Sketchbook' (lower right of the wizard).


When complete, close the library and now those specific fabrics will be in your project fabric library.
To quickly change the colors of the project, there are a couple of ways to do it.
1. If you want to just swap a fabric, use the SWAP icon on your tool bar --highlighted on the right below (next to the bottom icon)
select a fabric swatch and then click on whatever color you'd like to swap it for in the entire quilt.

 
2. If you want to change the number of colors or the order of colors or not duplicate the same color in another strip, then you may need to use another method. To re-color the quilt with this particular layout, select your fabric swatch, hold the  Alt key down and select a particular vertical strip. It will get half of the vertical zigzag. To get the other half click on the remaining portion holding the Alt key down and it will then have the specific color throughout the entire zigzag.
 
There are multiple ways to draw a similar design which can also result in a different construction method. The one above you'd be sewing triangles together in a strip and then sew the strips together. What if you wanted to just sew Half-Square Triangles (HST)? How would that look in your drawing?
 
It is a different type of layout, called a 'Horizontal Quilt'. To draw this yourself, go to 'Quilt...New Quilt...Horizontal.
 
Layout parameters will depend upon how big you want to make your quilt. So, choose your number of horizontal and vertical blocks, and the size of your blocks. You'll need to create one HST block in the 'Worktable....Work on Block. Draw a diagonal line from the upper left to the lower right corner. Save to the Sketchbook.
 
Go back to your quilt...'Worktable...Work on Quilt'.
 
Select the block you've just made, hold the Ctrl key down, and click in a square on the quilt. The entire quilt should now have the block.


In order to create the zig zag, every other block needs to be 'rotated' until you have the effect in the zigzag that you want. This particular shape gives you a lot of options to create a variety of striking designs. Have fun experimenting --here is a simple one.


The same grid ...but an 8 x 8 grid instead of the 4 x 4 above, can create a Carpenter's Wheel and on the right a pinwheel spiral all out of HSTs !!


If I start on the right hand column, rotate once, every other block all the way down that column.
In the next to last column, rotate the first one twice, and the next one 3 times; then twice and the next three times. Continue to the bottom. The next column over will be like the far right column. Continue doing this every other column and you'll get the zig zag effect. Perhaps the construction technique of making HSTs is easier for you--you can still get this zig zag effect.


To remove the 'block and patchwork' lines, hover on the quilt and 'right click' with your mouse. Uncheck the Outline Patches (any markings within the block) and Outline blocks (the actual outline of the block).


To change the colors to be the exact color that you'd like for that zigzag, select your fabric, and start clicking on each colorset that you want to change. This is a bit more tedious than in the Vertical strip quilt.
 
After experimenting, this is what I came up with using the Vertical Strip Quilt layout. Using a variety of red/white fabrics and a great Monochrome (by Jinny Beyer for RJR Fabrics) border. Using the fussy cut tool and the rotate fabric tool (lower right --they do not appear in the default installation setting, so be sure to 'add the buttons' if you need to), I maneuvered the border fabric to get this symmetrical effect.
 
 
This one will come out as a 48" x 60" lap/kid size--a great size for a 'Bag of Love'. I've rotated the image for illustrative purposes.


Fabric requirements as identifed in EQ7:


It only took me a couple of hours to sew the center together and I only needed about 14" x WOF for each of the 4 center fabrics because I chose to make them Quarter Square Triangles and then sew them together in rows. This keeps the long edge NOT on the bias. I then started playing with border ideas and ran out of time to blog about it here.
 
Here is the center during construction and the start of my border tryouts.


The actual fabrics used in the center are available in my studio.
You're welcome to request a kit if you'd like. -Several have asked about prices, so I'm updating the blog post now to include this image and info.

Only the top fabric is a wideback. If you’d like a yard of each or some equal quantity of all 6 (would include the 1 yard x 3 yard wide back) then I’ll offer them for $8.75/yard. This is price is good through Feb. 2 on a first come, first serve basis.
 
 
SNEAK PEAK note: AQS is coming out with a Red and White Quilts Book and I've been asked to quilt two of the featured quilts. Follow along on my blog for some additional sneak peaks of my quilting progress before the book is available.
 
The American Folk Art Museum posted photos here of the 2011 exhibit while it was under construction. Very inspiring!
 
Thanks for stopping by. Hope you've been inspired, learned a thing or two and will consider participating in the Red and White Quilt Challenges coming up this year. Maybe I'll get this one entered! Check out other participating blogs during the hop below:
 
Monday, January 27th
Heidi/EQ Blog – Behind the Mouse, the Electric Quilt Blog http://doyoueq.com/blog/

Tuesday, January 28th
Marlene/Kissed Quilts - http://kissedquilts.blogspot.com/

Wednesday, January 29th
Connie/Freemotion Quilting By The River - http://www.conniekresin.com/

Thursday, January 30th
Bea/Beaquilter - www.beaquilter.com

Friday, January 31st
Raewyn/Love to Stitch -  stitchingfarmgirl.blogspot.com


Tuesday, December 31, 2013

WIP 2013 Recap

Although I didn't have a strong finish at the end of the year of personal projects...I did for my clients.

But this report is about my personal projects for the year and includes commissions or charity projects that I collaborated on.

On my original list for 2013 and finished:
1 -Rose of Sharon Bird Block --"Rose of Hope"
2 -Irena Bluhm Colored Pencil class project "Florabunda"
3- Skill Builder Sampler --"Rosie's BOMb"
7 - Valentine Jelly Roll Race- "Racing Hearts"
15 - Christmas Friendship Star Block Lotto win in December - "Christmas Friends"


Extras:
4 - Valentine Postcard - sent to a friend (domestic machine)
5 - QR Code "KQ via QR"
6 - Book Cover --gave to my mom (domestic machine)
8-11 - 4 similar tree quilts to commemorate the life of a mother and wife
12 - Jeans brick wall - "God's My Foundation" - to commemorate the life of a daughter
13 - 19th Anniversary Commission
14 - "Day and Night" - Barbara Shapel class piece - Maple Tree (domestic machine)
16 - INMQ Wholecloth Challenge - "Dreamland"
17 - "A Paris Engagement" Commission
18 - Fall Table Runner Commission
19 - "Coulee Vintage Sonnet" - pieced by Peggy Nevsimal - donated for auction at the Grand Coulee Chamber of Commerce Vintners and Brewers Event.

Misc. 20 -- Various Charity Blocks: Boston Strong blocks sent to Boston. Also sent several blocks and fabric donations for the Facebook group 'Just us Quilters' charity projects, this included several unquilted and no batting receiving blankets for an orphanage in Africa (domestic machine).

Totals:

Still WIP: 5
  • Christmas Gift #1  --(ready to quilt)
  • Christmas Gift #2 --(ah well....good intentions, so much for my week before Christmas body ordered rest)
  • Honeymoon Storm at Sea
  • Fall Wallhanging
  • 2007 Alaska Shop Hop


  • NO PROGRESS: 7
    • OWN
    • Out of the Darkness
    • Basket BOM (ready to quilt)
    • Peace Park
    • Snowflake/blizzard --except that I used some of the snowflakes as inspiration for the Cool Penguin design.
    • 2007 Shop Hop the Blues
    • 2009 Shop Hop the Blues
     
    2013 Completed: 19

    p.s. ---including these and client quilts, I quilted 101 items on my long-arm, 3 on my domestic and pieced a few unquilted blankets and blocks for charity too! Not bad for a slow start given the move to Grand Coulee that started in January of this year and finished up in March.

    Hoping my shoulder will start cooperating in the new year so I can get back to a balanced schedule of productivity!

    Happy New Year everyone!!

    Sunday, December 1, 2013

    December Goals

    Sometimes it feels like I've lost the opportunity to do any of my own work now that I've got so much going on with the business.

    I do have a couple of Christmas gifts to finish up and of course all the --'please by Christmas' client quilt tops to get done as well.

    Our Technique Class is going through methods of how to make Flying Geese this month and there are no project classes so that we all can spend time with our families.

    Two personal projects that would be really fun to try and get through before the end of the year --the Fall Wall Hanging and my Storm at Sea quilt. With a full week from Christmas to New Year's...just maybe this can happen!

    The Fall Wall Hanging I think will have evolved from the last time you saw it because I made some leaf blocks that won't fit in their intended project (I used the wrong grid size (DOH!), but might add so much to the wall hanging. yeah!


    The Storm at Sea now has all fabric bits ready and waiting to be sewn and then the assembly of at least the center. Borders..well, we'll have to wait and see.


    November Finishes

    Missed posting these as goals, so here are my results for the month.

    1. This month's Technique classes cover Half Square Triangles. It has been so fun to see the light bulbs turn on in my students! Their results are improving every week and their excitement makes me smile. Here is a shot of the morning class after block 2.1 (1st block of Month 2)....the Churn Dash.


    2. Tuesday before Thanksgiving--our project class was a Jelly Roll Race!


    3. Client quilts --including a run to Walla Walla for dropoffs (4) and pickups (12) and two headed for publication in a book. This month I finished my first 4 years of owning a long-arm. An entire post about it is here. Amazing that it has been over 250 client quilt tops delivered to me that I returned at least quilted ...some bound. Added to that would be my own quilts and commissions that I did from start to finish. I quilted 14 client tops this month and did a commission as well (see below).


    4. This fall table runner was commissioned to be given as a gift at a Thanksgiving Celebration. How thoughtful of the guest. - Finish #18


    5. Donating the fabric and my quilting of a vineyard themed quilt for our local upcoming Wine Auction. I convinced the Chamber manager, Peggy Nevsimal (also one of my students) to piece it! The event is sold out, but remote bids are being taken via the Grand Coulee Dam Area Chamber of Commerce, 509-633-3074. The event is December 7.  (p.s. I'm going to count this as finish #19!)


    6. The latest Country Register in your region will likely include instructions to make this adorable penguin. Be sure to pick up your own copy!